SUSE Adaptive Telco Infrastructure Platform (ATIP)
SUSE ATIP is a platform designed for hosting modern, cloud native, Telco applications at scale from core to edge.
This page documents the creation of edge sites using the management cluster created in the previous section. There are different ways to create edge sites, depending on the use case. Also, there are different options to customize the edge site creation with the most common Telco/Edge options
We will cover the following topics which are really interesting for the Telco industry:
Edge site definition: Basic definition of an edge site.
- Custom Registry: Extra registries to be used by the edge site.
- CPU Management Policy: CPU management policy to be used by the edge site.
- Networking: Networking configuration to be used by the edge site.
Installation process: Installation process of the new edge site.
Edge site definition
The new Edge definition will be steps required to create and configure properly a new edge cluster from the Rancher Management tool. We will also offer some extra options which are really common used in the Telco industry to customize the edge site creation in case you need some of them.
Create new edge site
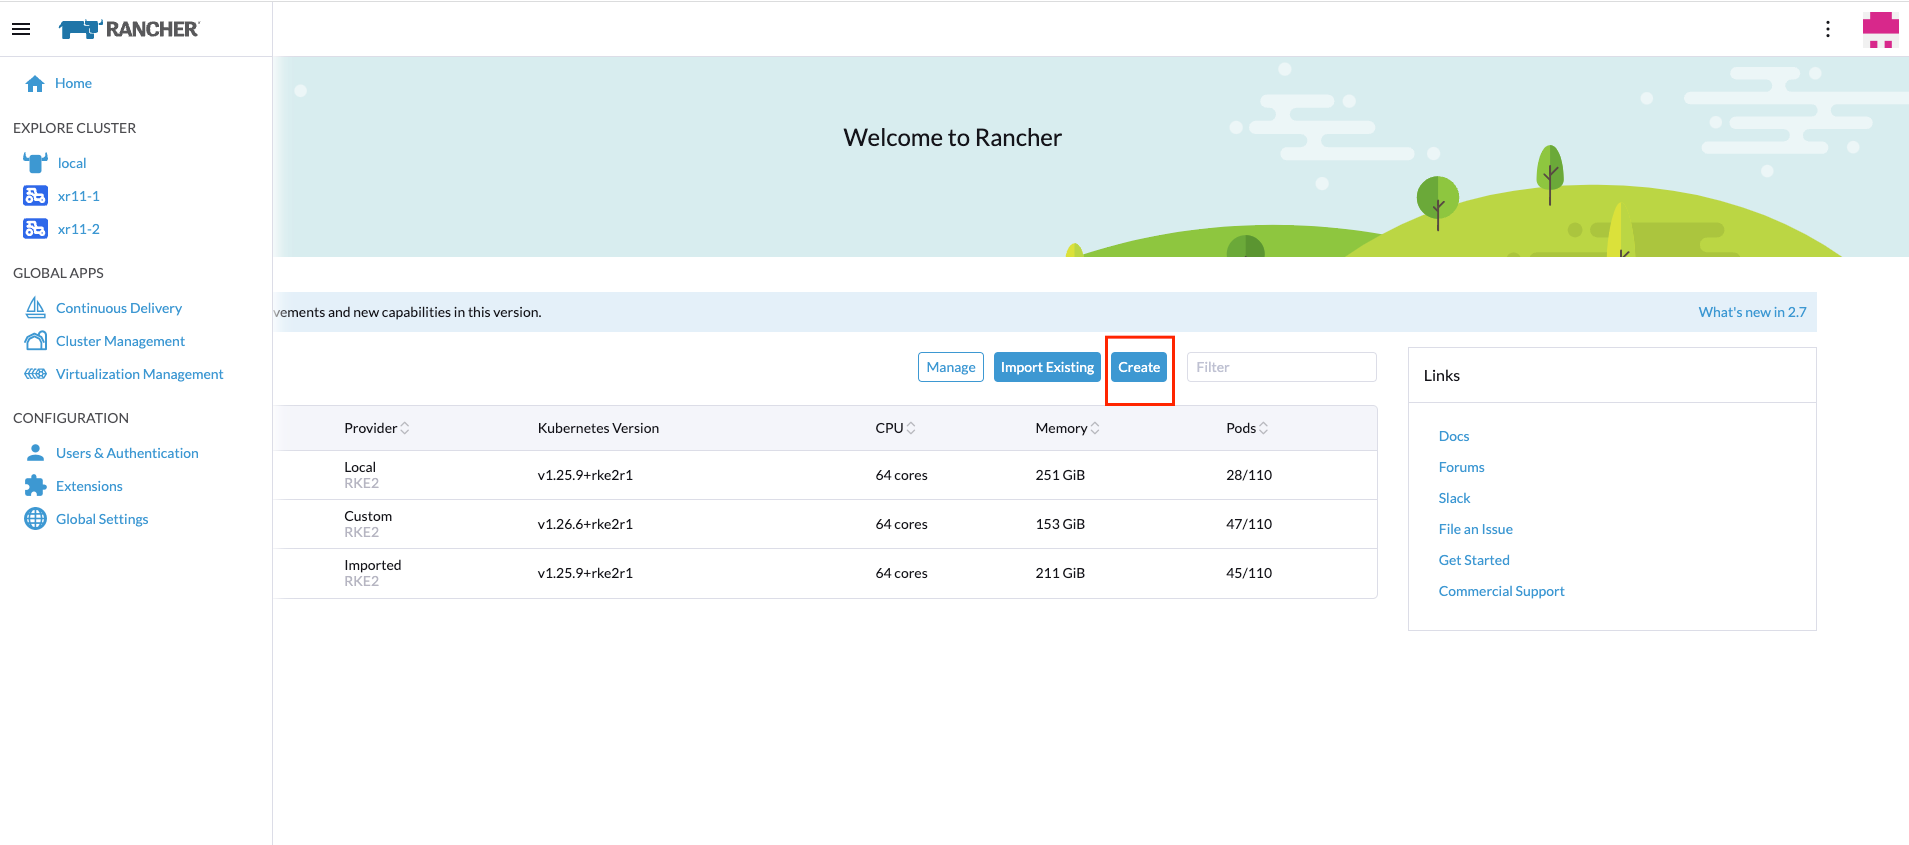
To create a new edge site, you need to go to the Clusters section and click on Create button:
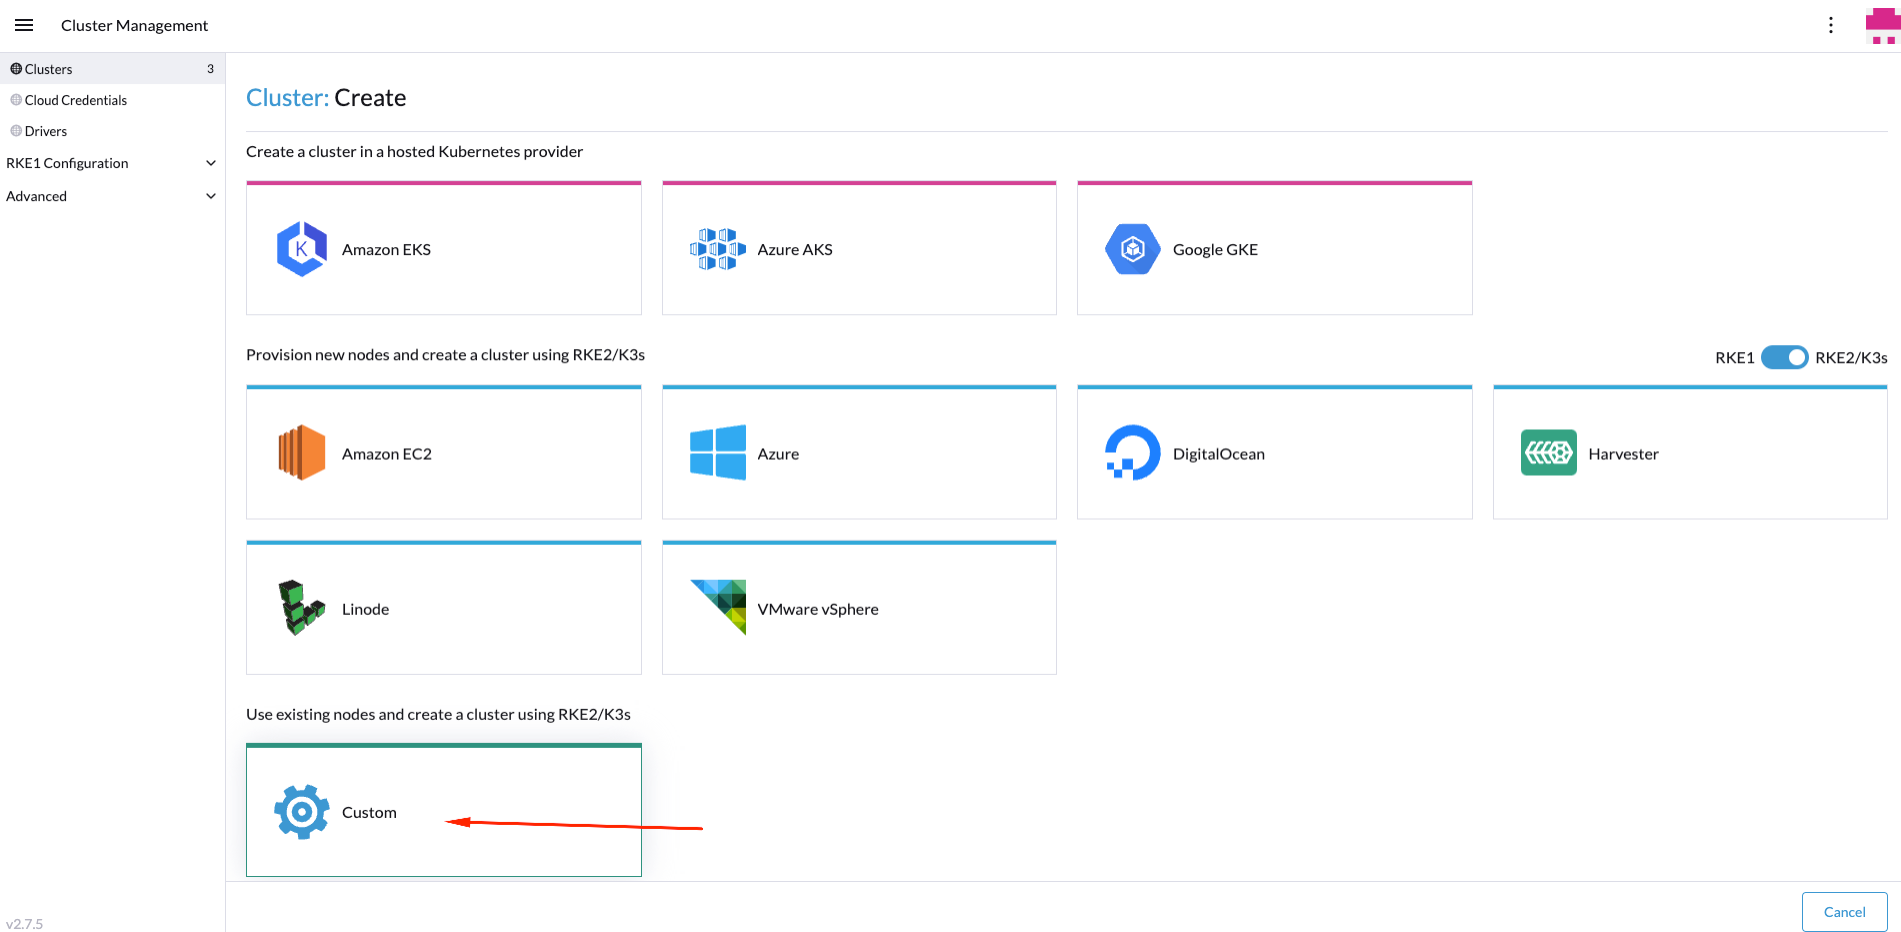
Then, you could select the provider to be used to create the new edge site. In our case, we will use Custom provider:
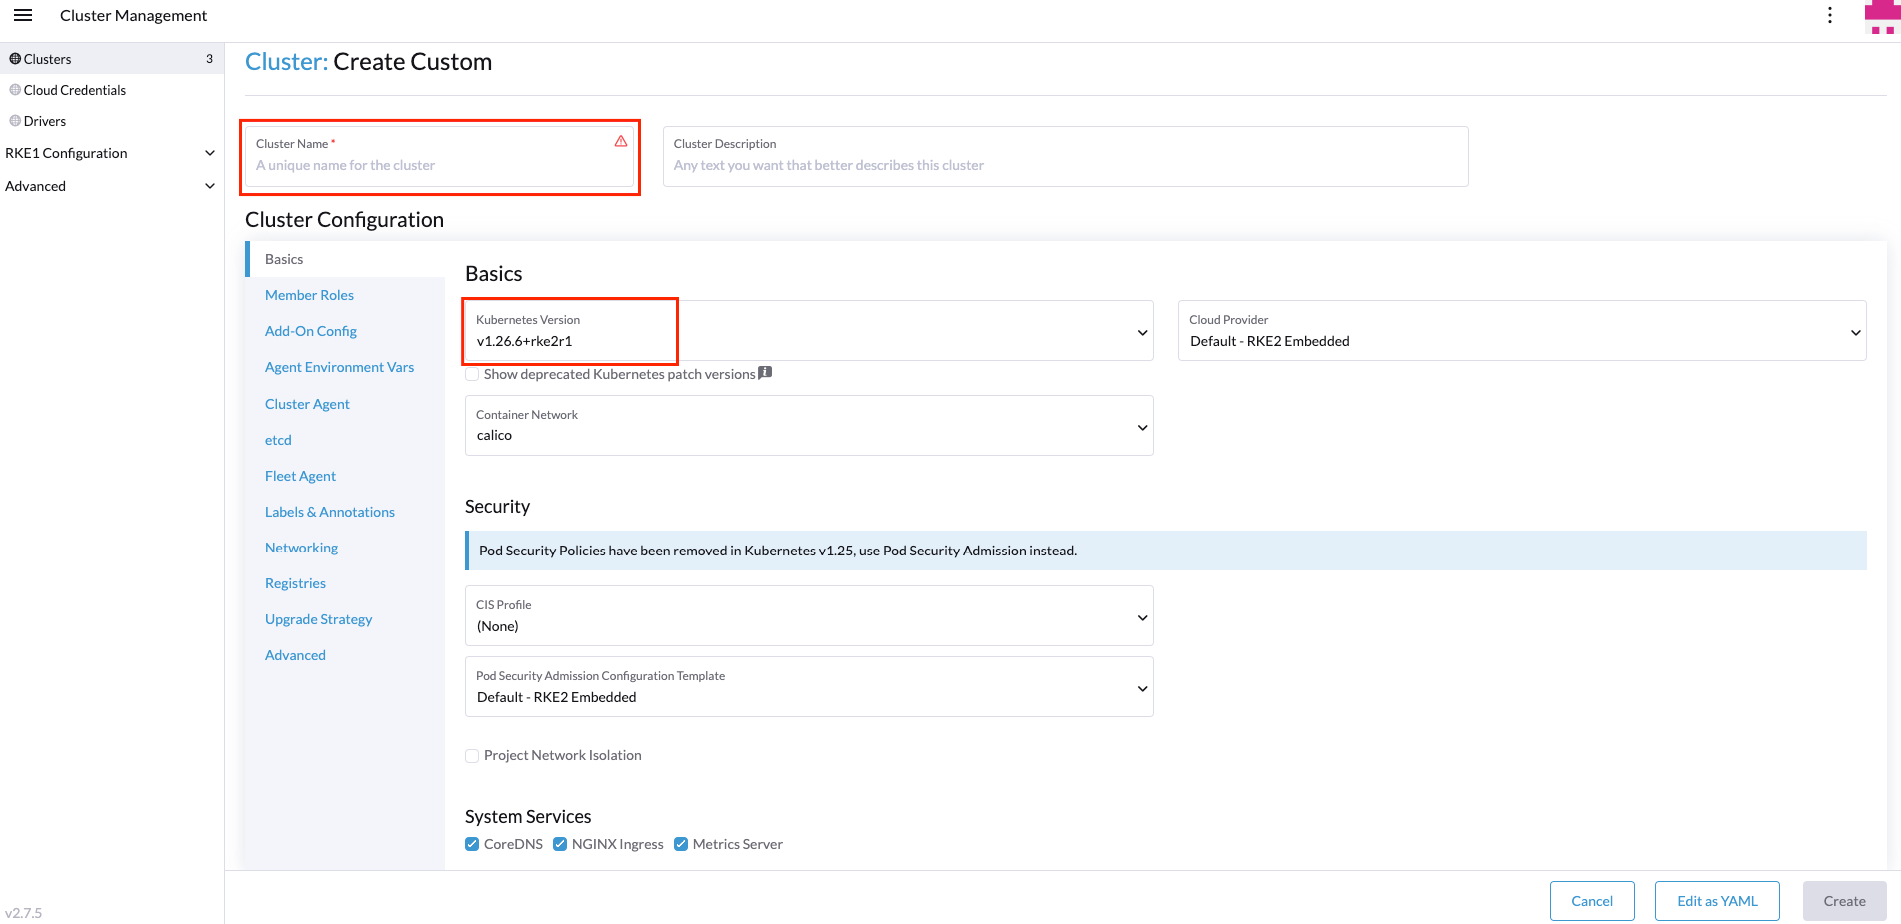
Next step is to name the new edge site and select the cluster version to be used:
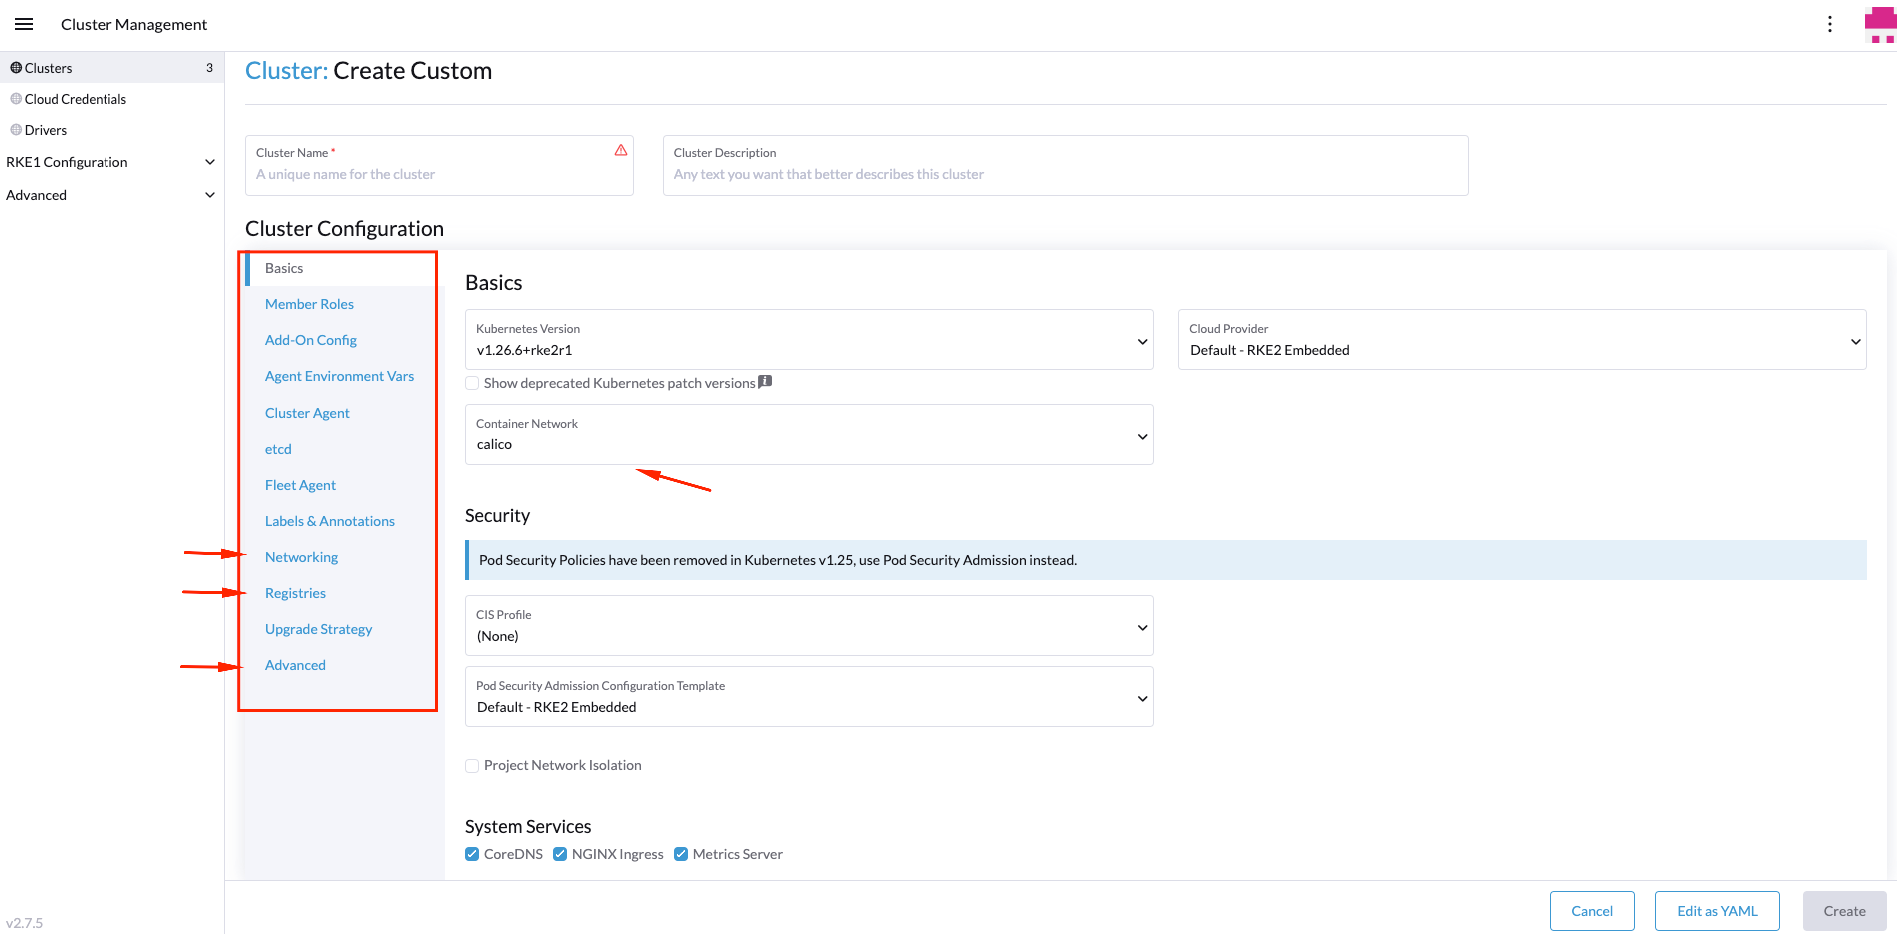
Now, it's time to customize our installation defining some of the most common Telco/Edge options. To do that we will use the next tabs on the left side:
Custom Registry
Rancher offers the possibility to use extra registries to be used by the edge site. This is really useful in case you need to use some extra images which are not available in the default registries, but you've got deployed another internal registry to be used by your edge site.
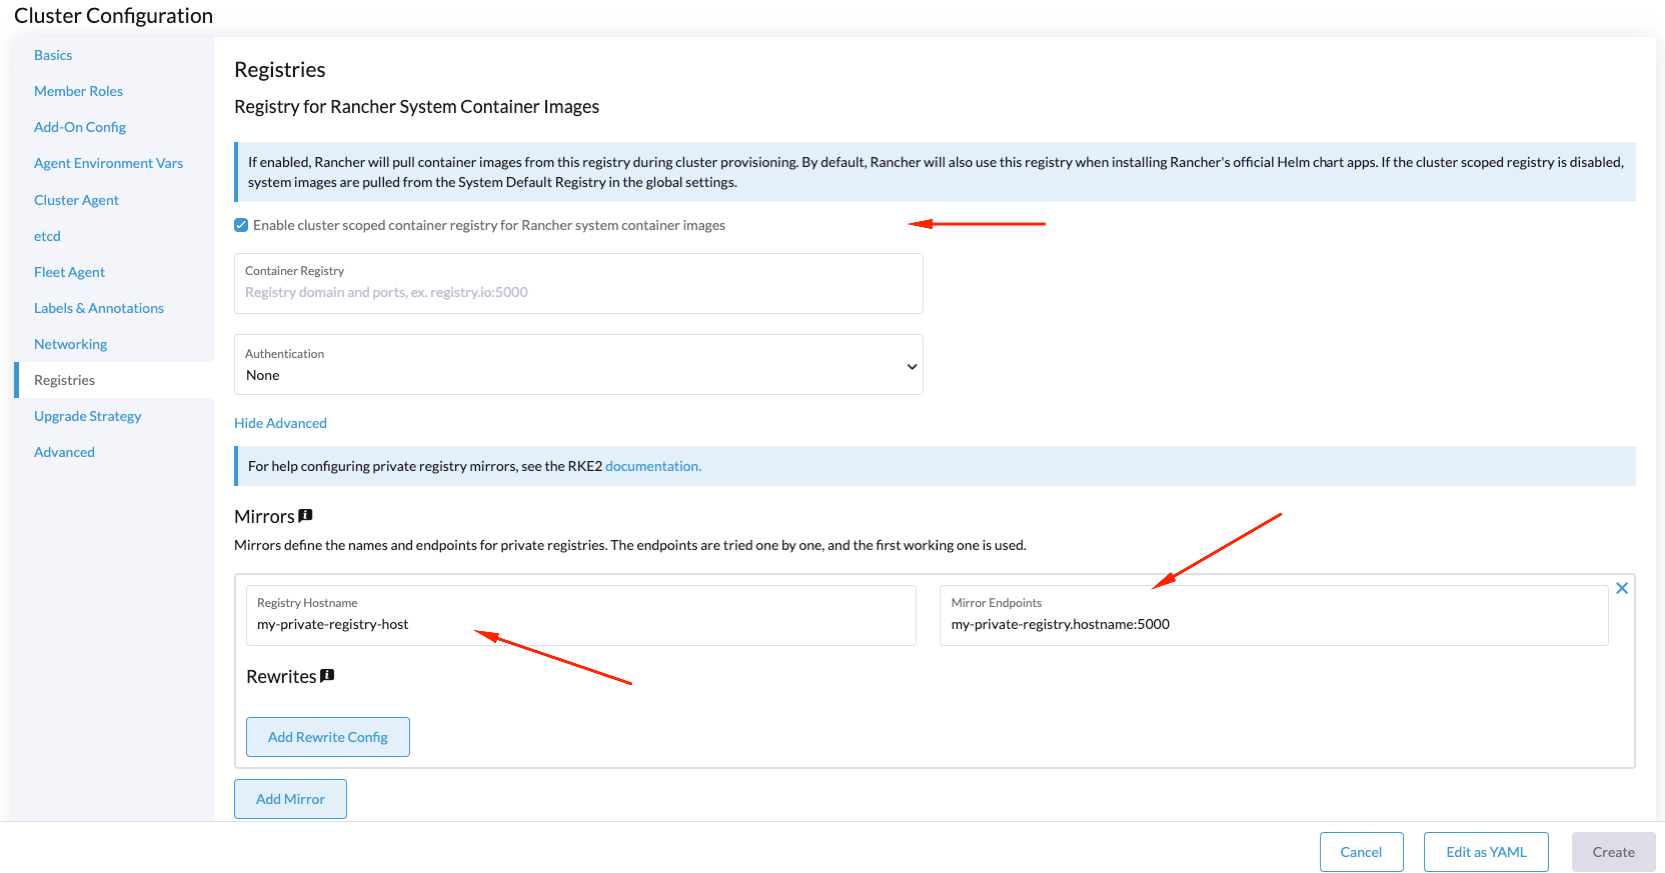
In case you need to add some extra registries, you could do it from the Custom Registry tab:
- Enable the extra registry adding the private registry information
To enable the private registries, you need to click on Enable cluster scoped container registry but take care don't change the value, in order to keep the default Rancher registry available for the system images.
The idea is to keep the default registry for the system images using the rancher registry, and then, add a new registry (named mirror) to use a secondary private registry where your application images are stored:
To do that, you should enable the option Enable cluster scoped container registry keeping the container registry empty (to use the default for system images), and then, add a new private registry information:
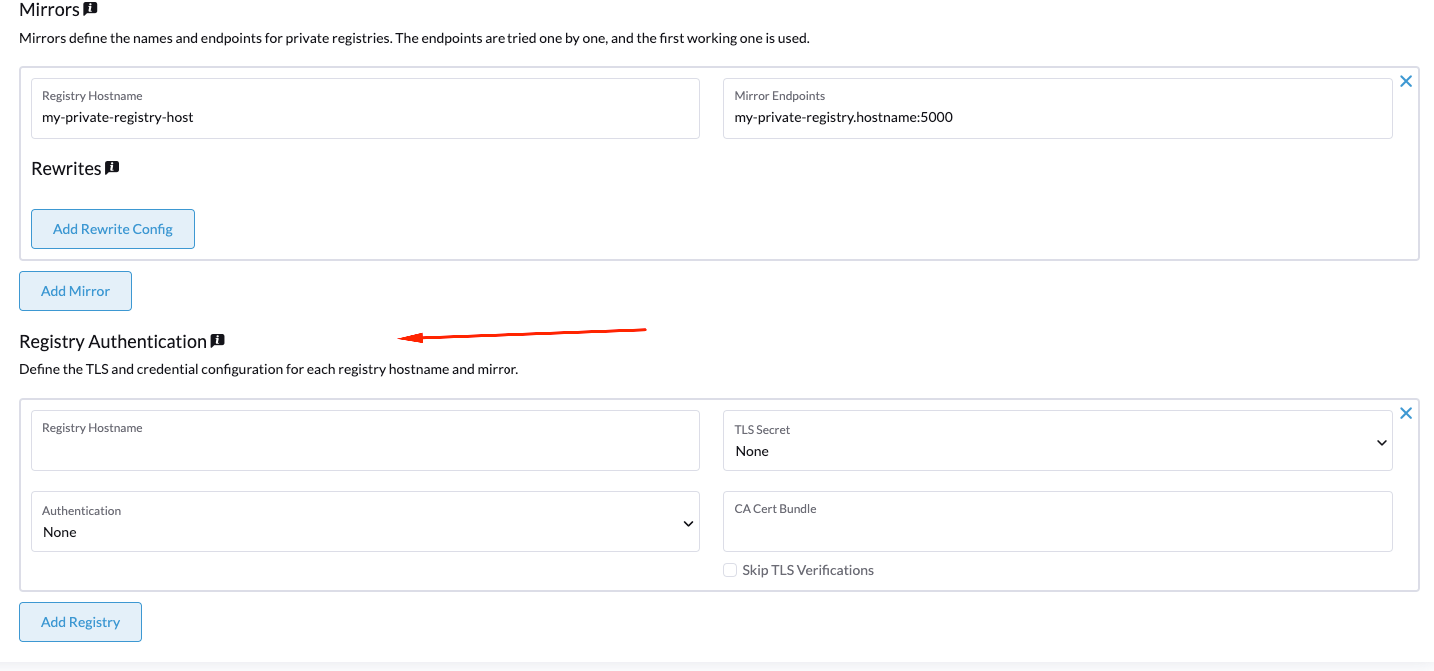
- You could also add some information regarding the authentication to be used by the private registry:
- If you want to modify directly using a yaml file the private registry information, you could do it using the next yaml file (you could download it from the
Edit as YAMLbutton):

CPU Management Policy
Rancher offers the possibility to use different CPU management policies on RKE2 to be used by the edge site. This is really useful if you need to tune the cpu cores management that you will offer to your workloads running on top of kubernetes.
For more information about the different CPU management policies available in Kubernetes, please check the official documentation
- To modify the kubelet in order to allow some cpu management policies you could do it from the
Advancedtab:
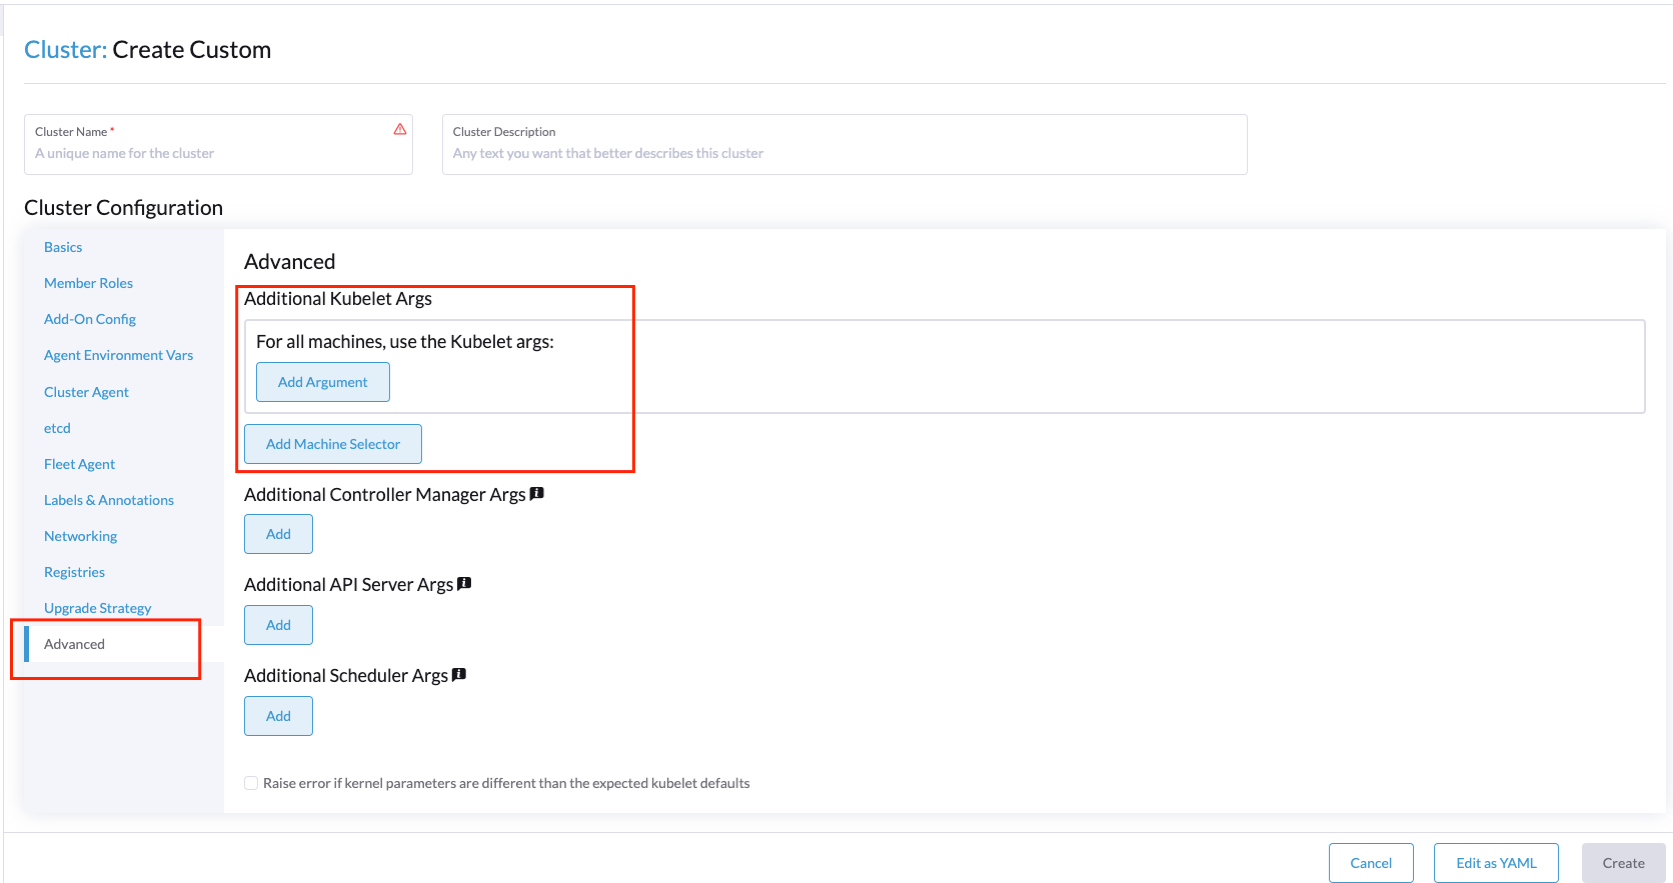
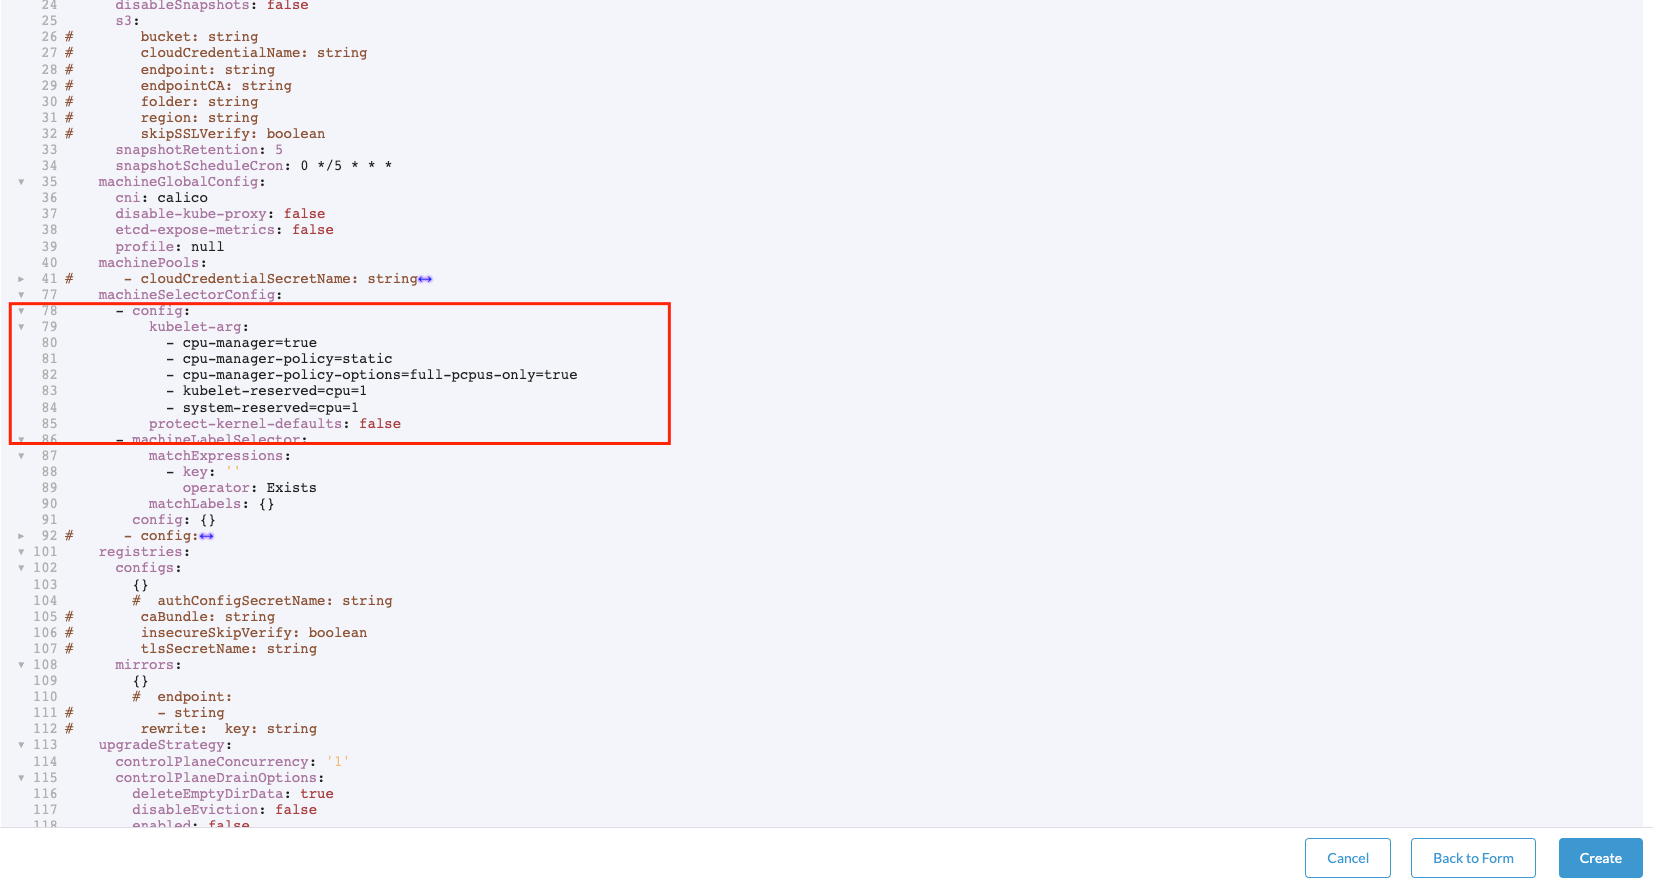
- You could add some cpu management policies using the
kubeReservedandsystemReservedoptions:
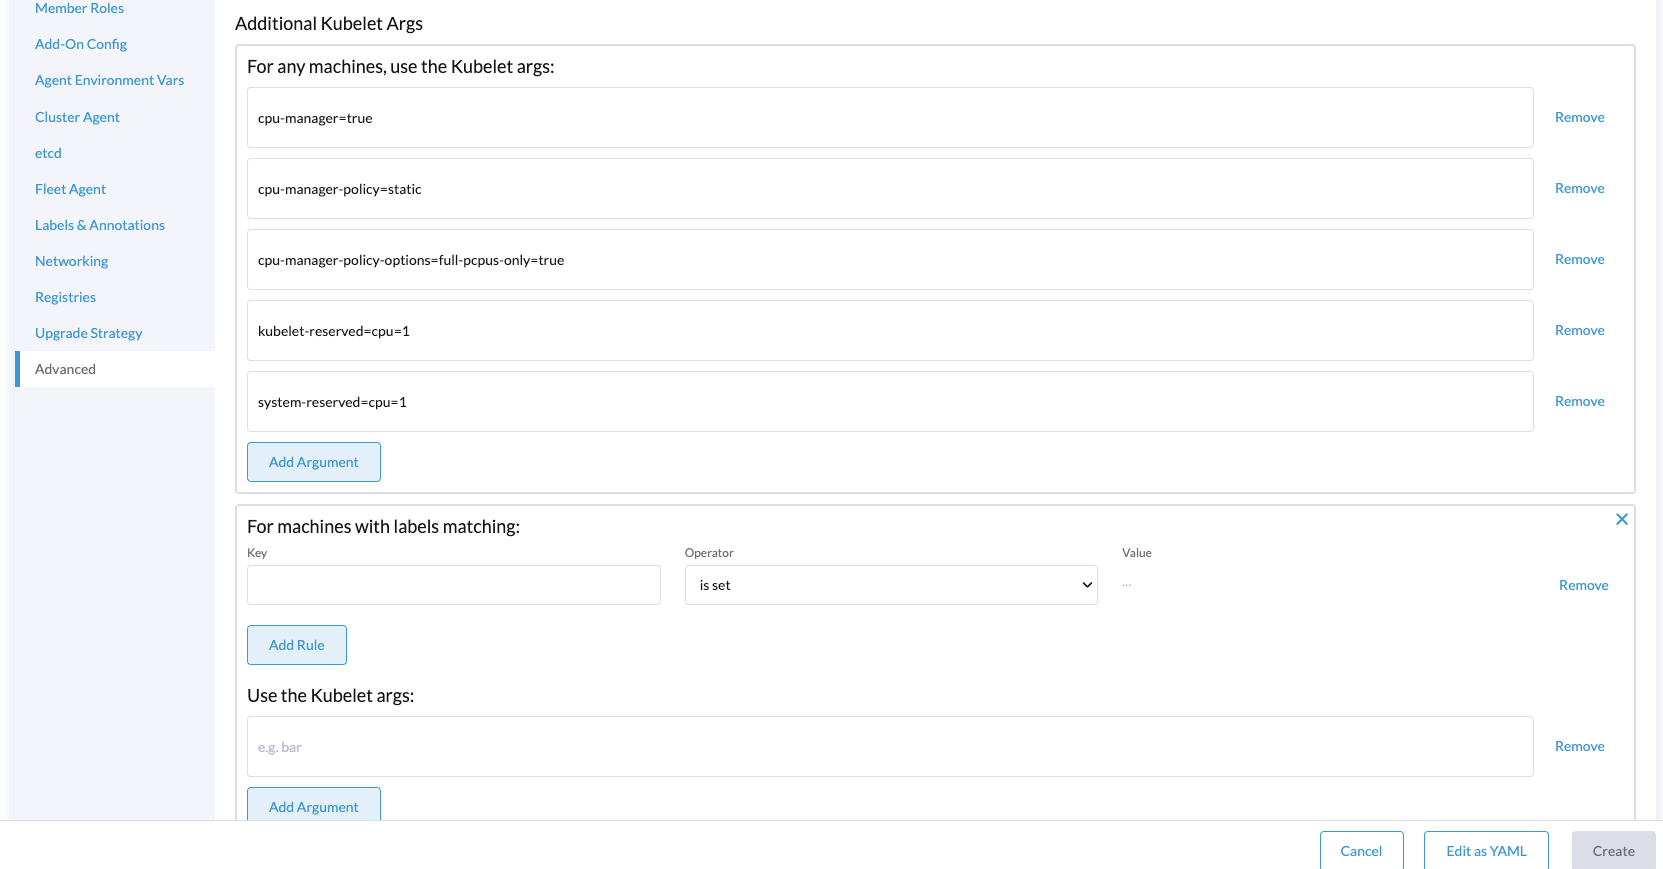
Also, you could add some machine labels in order to match with the node labels that you will use in your workloads.
- If you want to modify directly the information regarding the kubelet, you could do it using the next yaml file (you could download it from the
Edit as YAMLbutton):
Networking
Rancher offers the possibility to use different networking options to be used by the edge site. Also you could install directly some CNI plugins to be used by the edge site like Calico, Cilium, Multus, and the combination with Multus
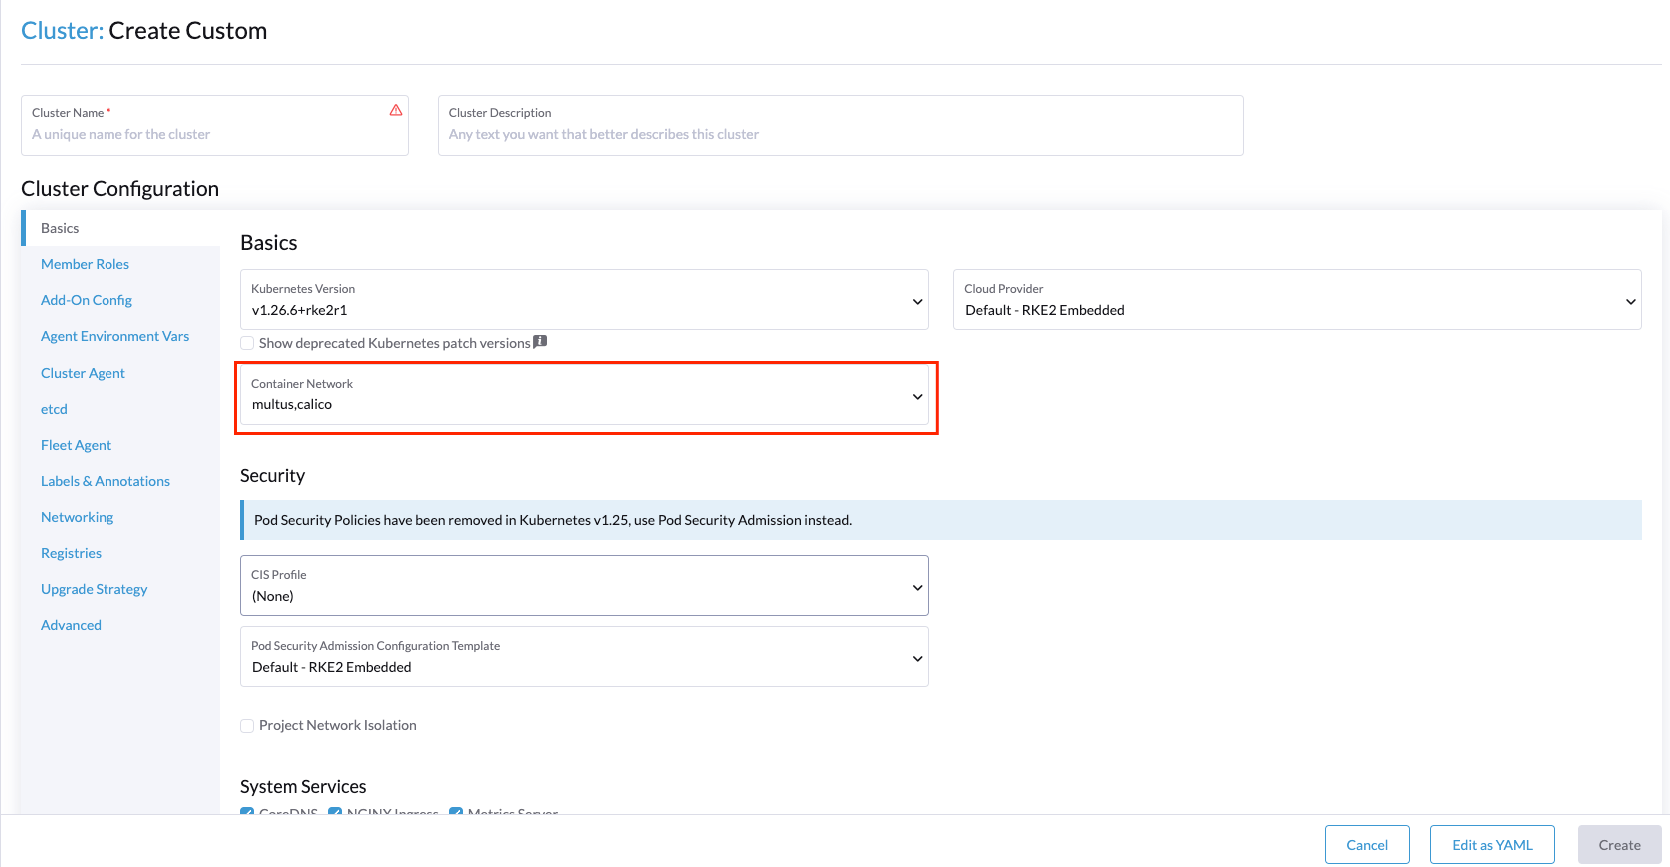
In our case, we will use the Multus + calico combination, but you could use whatever you want.
- Configure the Container Network Interface (CNI) plugin to be used by the edge site:
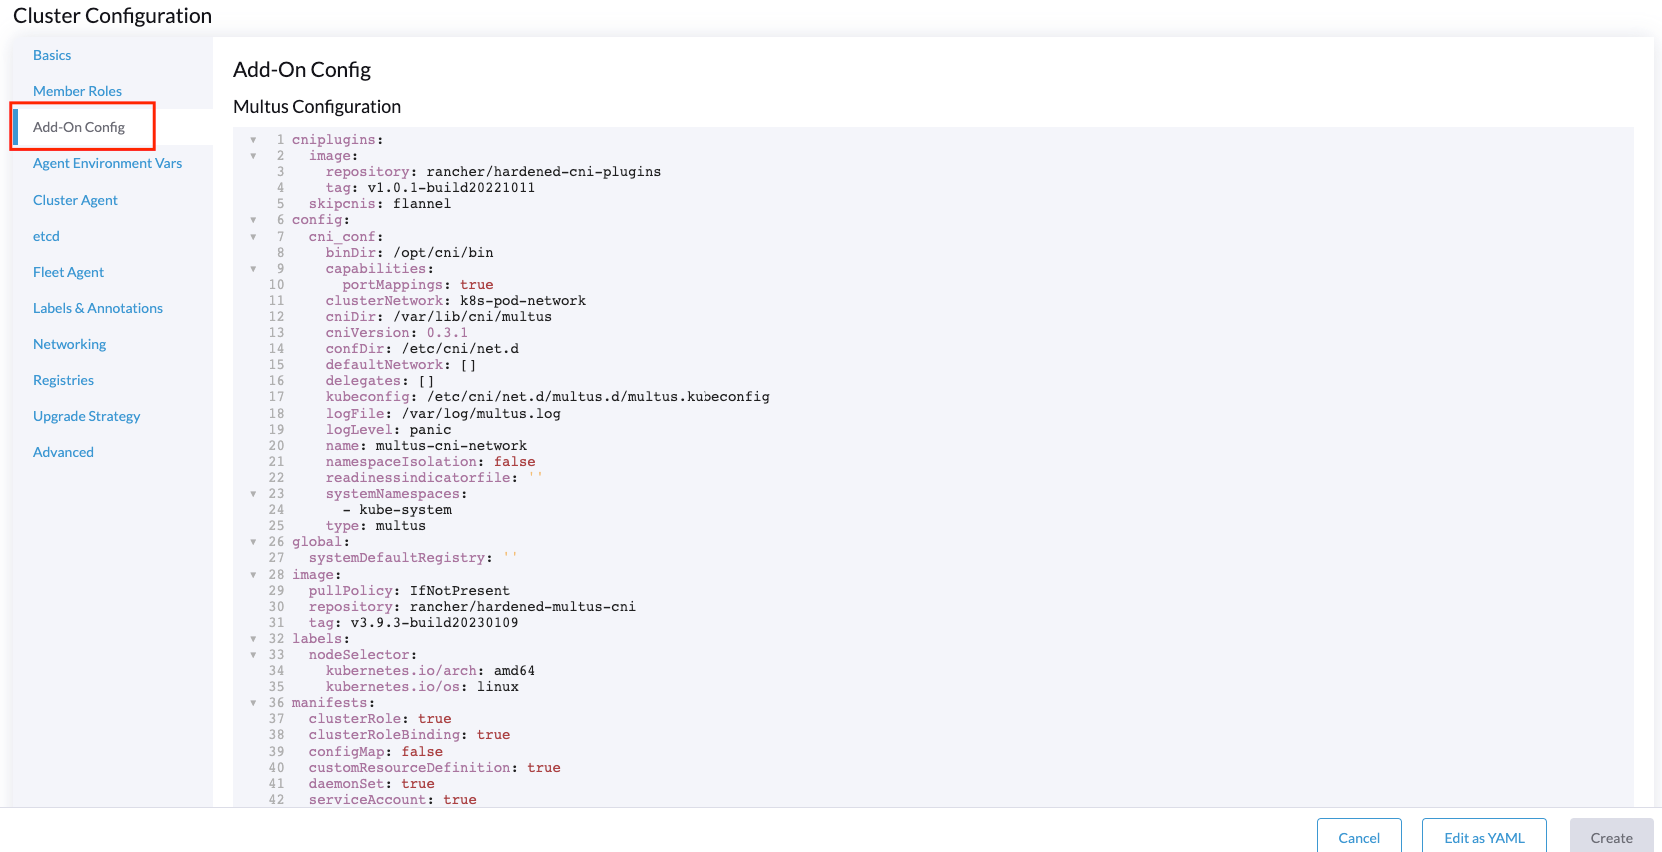
- Define some extra options using the
Add-On Configtab (optional - if you need some specific options for the CNI plugins):
In case you need to modify some more specific options regarding the CNI plugins you could do it using the next yamls files which contains the configuration for the CNI plugins:
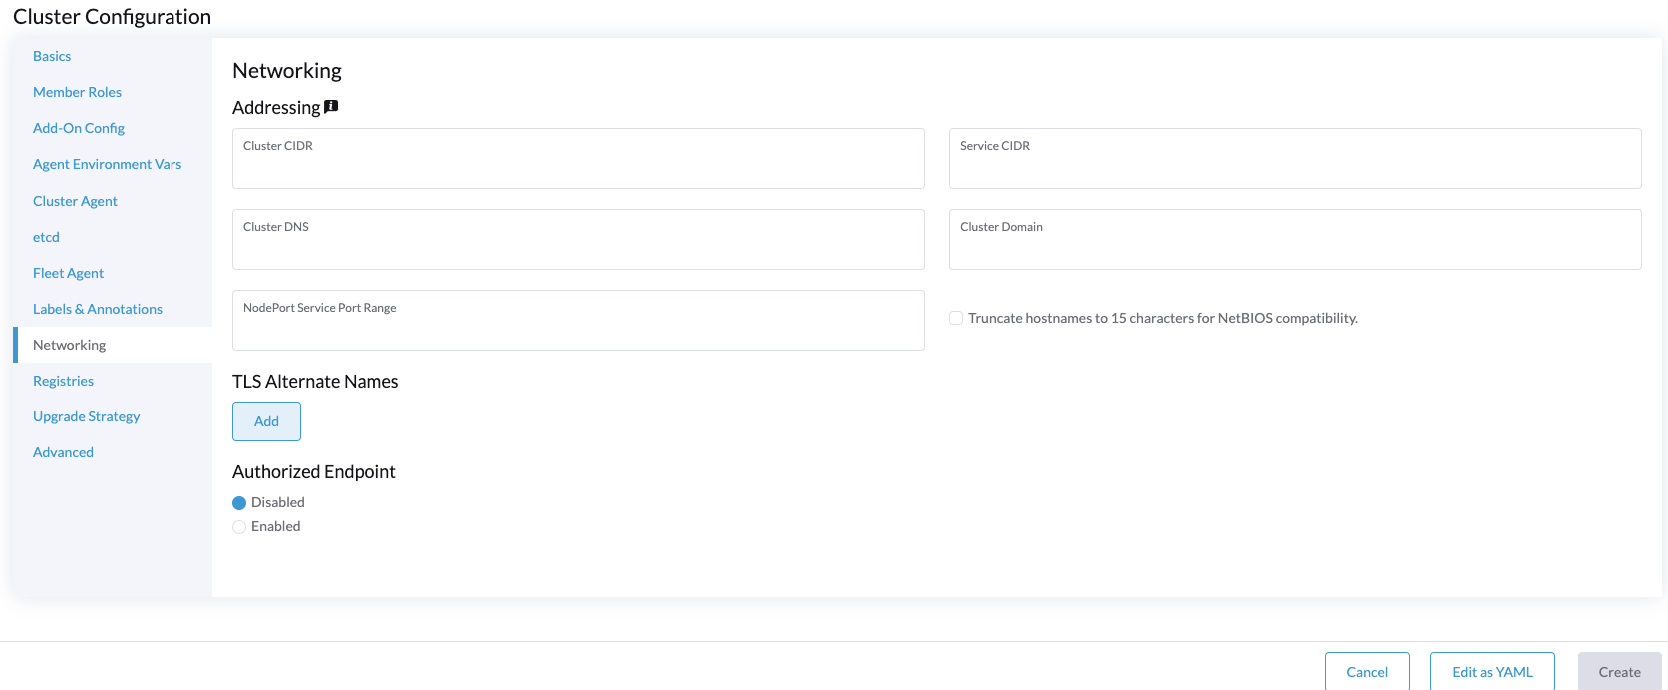
Also, you could define the general network for the cluster to be used by the edge site:
Installation process
After the edge site definition, you could click on the Create button to start the installation process:

In our case, we've selected the node role etcd, control plane, and worker because we want to deploy a single node cluster, but you could select whatever you want depending on your use case.
The next step should be copy the registration command to be used by the new edge node, and then, execute it on the new edge cluster server to start the installation process.
Note: you could use the insecure check option in order to skip the TLS verification if your server has a self-signed certificate.
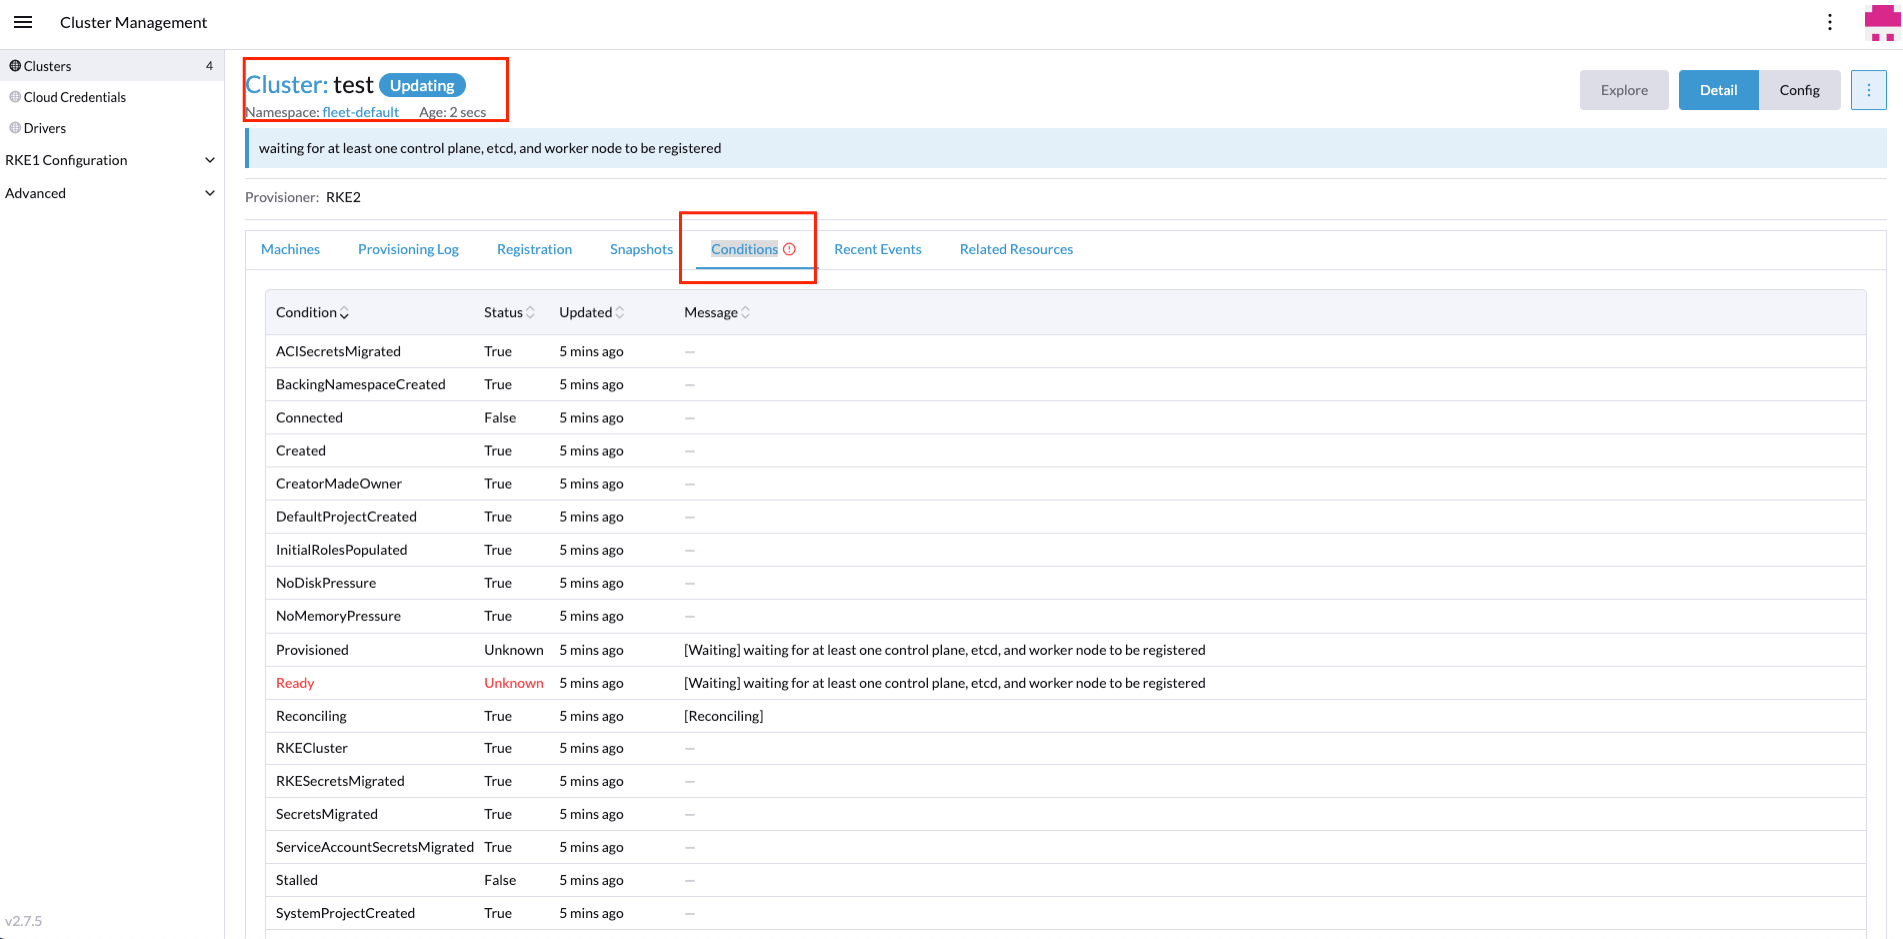
During the installation you could see the process using the Conditions and the Recent Events tabs:
After the installation process, you could see the new edge site created successfully on the Home page or in the Clusters section.