Remote host onboarding with Elemental
What is Elemental?
Elemental is a software stack that provides for remote control over the lifecycles of the Operating System, Kubernetes, and workload in a secure and declarative way.
Why use this method
Elemental can be very useful for scenarios where the devices that you want to control are not on the same network as the upstream cluster or don't have a BMC onboard to allow more direct control.
TODO: expand
High Level Architecture
TODO: Draw image
Resources Needed
At the very least, you need:
- A host for the "upstream" cluster (the one hosting Rancher and Elemental) with:
- Minimum 8GB RAM and 20GB disk space for development or testing
- For production use: See https://ranchermanager.docs.rancher.com/pages-for-subheaders/installation-requirements#hardware-requirements
- A host to be controlled
- Could be physical device or Virtual Machine
- Minimum 25GB disk
- A resolvable hostname
- Or static ip address to use with a service like sslip.io
- A host to build the installation media with
- (If using physical hardware) A USB flash drive to boot from
- Existing will be overwritten as part of the process
In the writing of this guide, I will be using a Digital Ocean droplet to host the upstream cluster and an Intel NUC as the downstream device. For building the installation media, I will be using my desktop running openSUSE Tumbleweed.
How to Use Elemental
The basic steps to install and use Elemental are:
- Build bootstrap cluster
- Install Rancher
- Install Elemental Operator and Rancher UI Extension
- Build installer disk
- Boot device with installer
- Create downstream cluster
TODO: Record video and embed
Build Bootstrap Cluster
The first thing we need to do is create a cluster that can host Rancher and Elemental. This cluster needs to be routable from the network that the downstream nodes are connected to.
TODO: make prose
- Create Kubernetes Cluster
- Install Rancher
- Install Elemental
- (Optionally) Install Elemental UI Extension
Create Kubernetes Cluster
If you are using a hyperscaler (such as Azure, AWS, or Google Cloud), it's likely easiest to set up a cluster using their built in tooling. For the sake of conciseness in this guide, we will not be detailing the process of each of these options.
If you are installing onto bare metal or another hosting service where you need to also provide the Kubernetes distribution itself, we recommend using RKE2.
TODO: Should I add more detail?
Setup DNS
Before continuing, you will need to setup access to your cluster. As with the setup of the cluster itself, how you configure DNS will be different depending on where it's being hosted.
If you don't want to deal with setting up DNS records (for example this is just an ephemeral test server), you can use a service like sslip.io instead. With this service, you can resolve any ip address with <address>.sslip.io.
Install Rancher
To install Rancher, you need to get access to the kubeapi of the cluster you just created. This looks differently depending on what distribution of Kubernetes is being used.
For RKE2,the kubeconfig file will have been written to /etc/rancher/rke2/rke2.yaml. Save this file to ~/.kube/config on your local system. You may need to edit the file to include the correct externally routable IP address or hostname.
The simplest way to get Rancher installed is with these commands that can be found in the Rancher Documentation:
TODO: simplify these a bit TODO: Do I need to explicitly allow for "local" management in the helm install?
- Linux
- Mac OS
- Windows
Install cert-manager:
helm repo add rancher-latest https://releases.rancher.com/server-charts/latest
kubectl create namespace cattle-system
kubectl apply -f https://github.com/cert-manager/cert-manager/releases/download/v1.13.3/cert-manager.crds.yaml
helm repo add jetstack https://charts.jetstack.io
helm repo update
helm install cert-manager jetstack/cert-manager \
  --namespace cert-manager \
  --create-namespace
Then install Rancher itself:
helm install rancher rancher-latest/rancher \
  --namespace cattle-system \
  --set hostname=<DNS or sslip from above> \
  --set replicas=1 \
  --set bootstrapPassword=<PASSWORD_FOR_RANCHER_ADMIN>
Install cert-manager:
helm repo add rancher-latest https://releases.rancher.com/server-charts/latest
kubectl create namespace cattle-system
kubectl apply -f https://github.com/cert-manager/cert-manager/releases/download/v1.13.3/cert-manager.crds.yaml
helm repo add jetstack https://charts.jetstack.io
helm repo update
helm install cert-manager jetstack/cert-manager `
  --namespace cert-manager `
  --create-namespace
Then install Rancher itself:
helm install rancher rancher-latest/rancher `
  --namespace cattle-system `
  --set hostname=<DNS or sslip from above> `
  --set replicas=1 `
  --set bootstrapPassword=<PASSWORD_FOR_RANCHER_ADMIN>
If this is intended to be a production system, please use cert-manager to configure a real certificate (such as one from Let's Encrypt).
Browse to the hostname you set up and log in to Rancher with the bootstrapPassword you used. There is a short setup process that you will be guided through.
Install Elemental
With Rancher installed, you can now install Elemental itself!
The helm chart for Elemental is published as an OCI artifact so the installation is a little simpler than other charts. It can be installed from either the same shell you used to install Rancher or in the browser from within Rancher's shell.
helm install --create-namespace -n cattle-elemental-system elemental-operator-crds oci://registry.suse.com/rancher/elemental-operator-crds-chart
helm install --create-namespace -n cattle-elemental-system elemental-operator oci://registry.suse.com/rancher/elemental-operator-chart
(Optionally) Install the Elemental UI Extension
If you want to use the Elemental UI, you can go log in to your Rancher instance, click on the "hamburger menu" in the top left, then

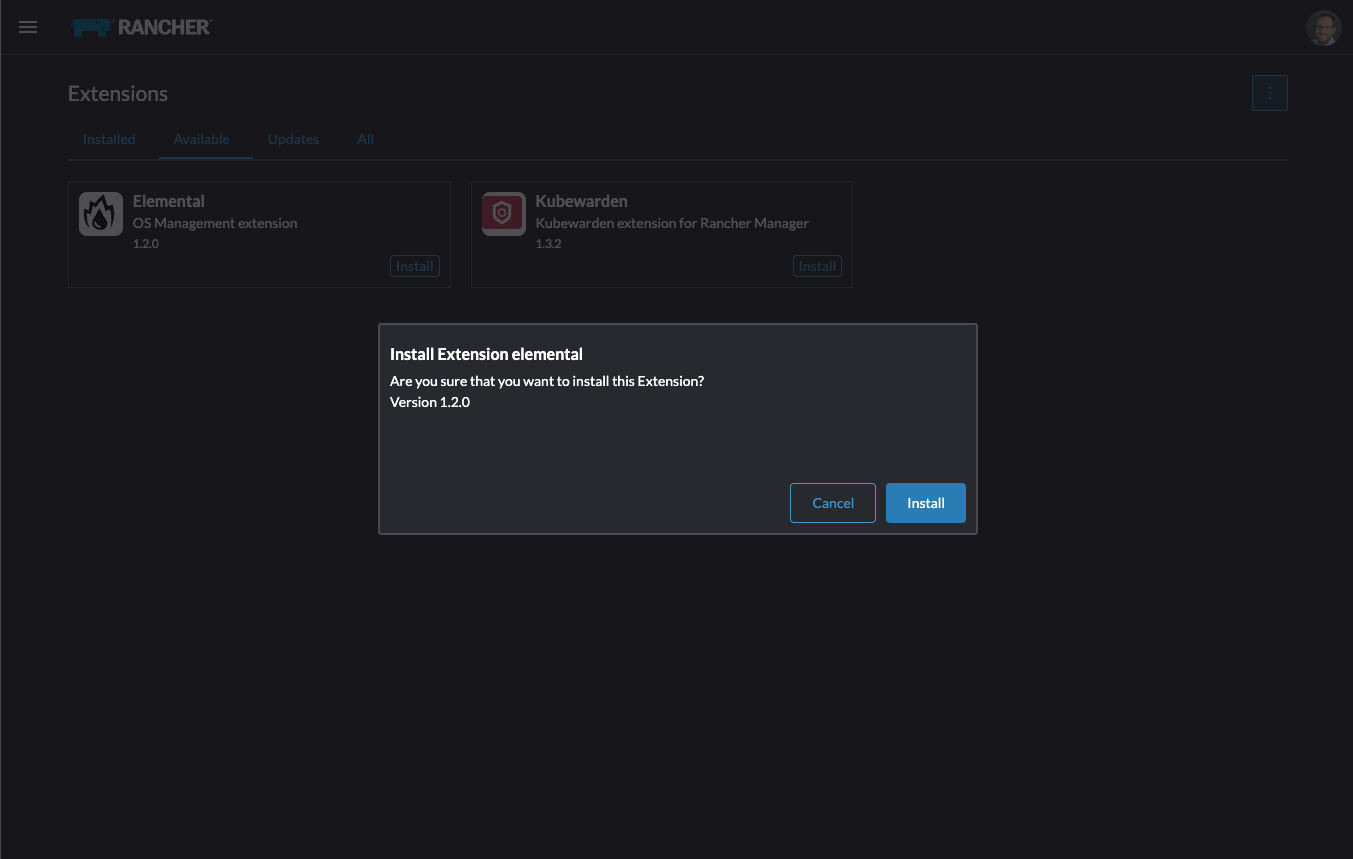
From the "Available" tab on this page, you can then click "Install" on the Elemental card:

Confirm that you want to install the extension:
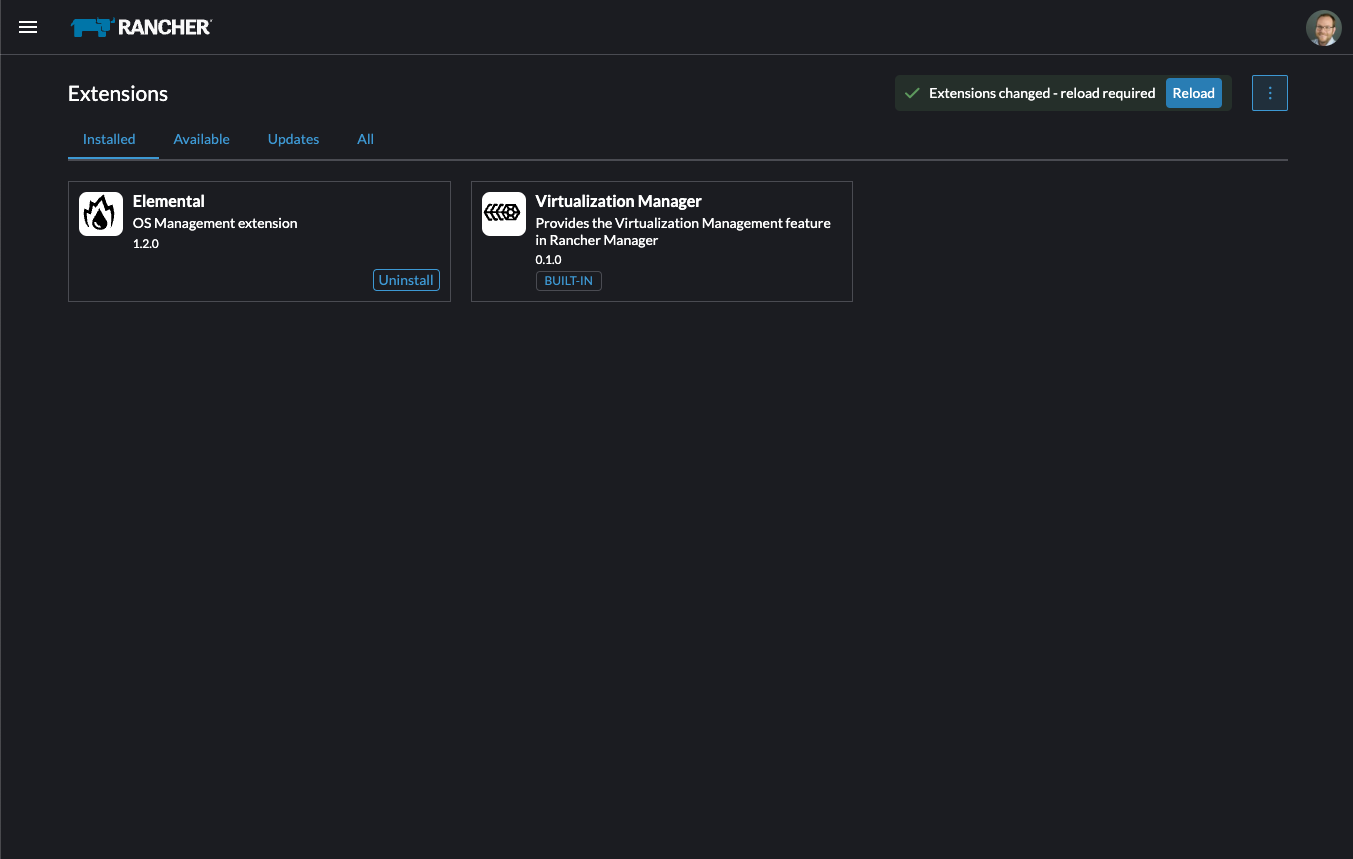
After this installs, you will be prompted to reload the page.
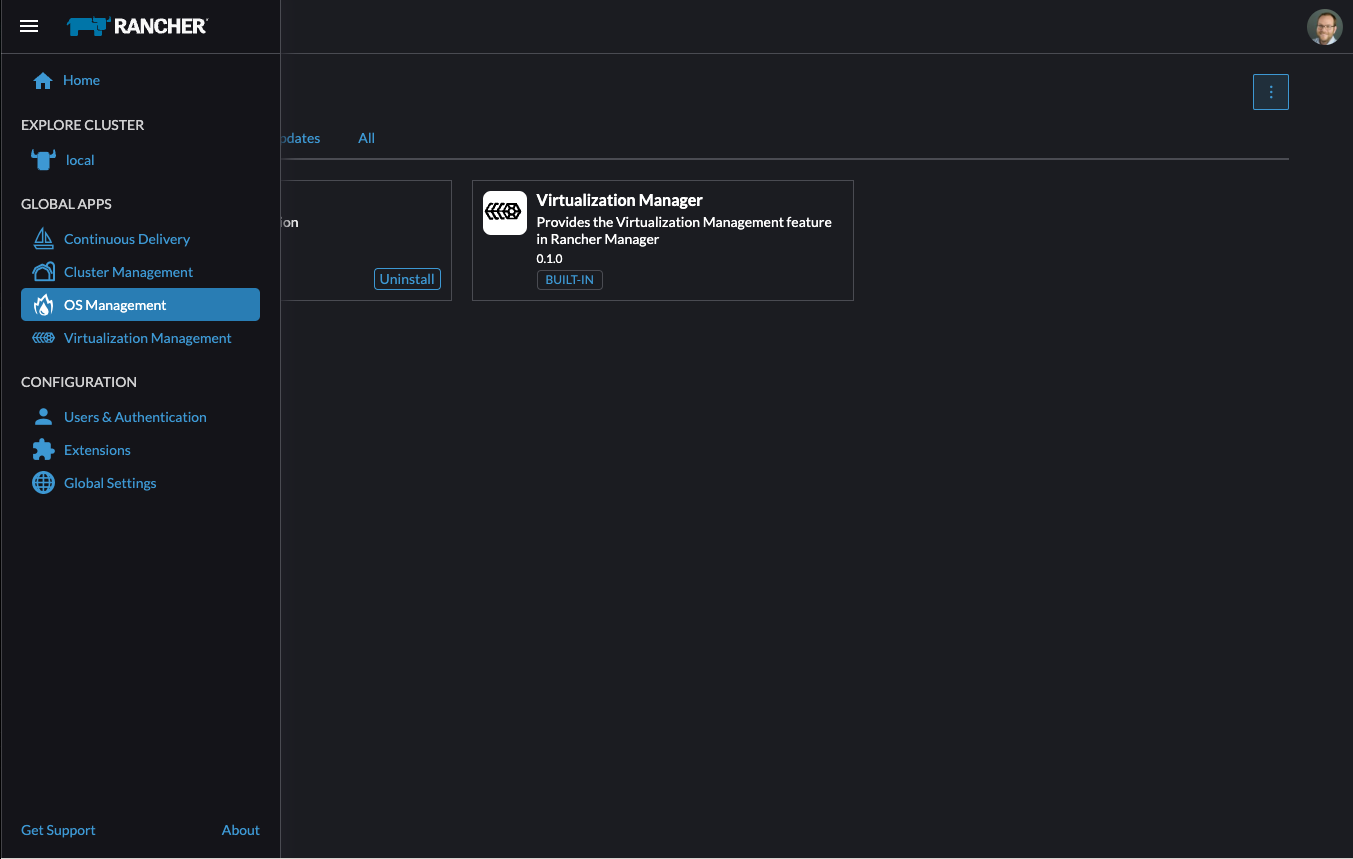
Once you reload, you can access the Elemental Extension through the "OS Management" global app.
TODO: annotate screenshots
TODO: retake screenshots with Rancher 2.8.2 and Elemental 1.4 once released
Configure Elemental
To allow machines to register to Elemental, we need to create a MachineRegistration object in the fleet-default namespace.
A fairly basic version of this object is:
apiVersion: elemental.cattle.io/v1beta1
kind: MachineRegistration
metadata:
  name: ele-quickstart-nodes
  namespace: fleet-default
spec:
  machineName: "${System Information/Manufacturer}-${System Information/Serial Number}"
  machineInventoryLabels:
    manufacturer: "${System Information/Manufacturer}"
    productName: "${System Information/Product Name}"
We can create this object in a few ways:
- YAML
- UI Extension
Create a file with the yaml from above called registration.yaml the apply it with:
kubectl apply -f registration.yaml
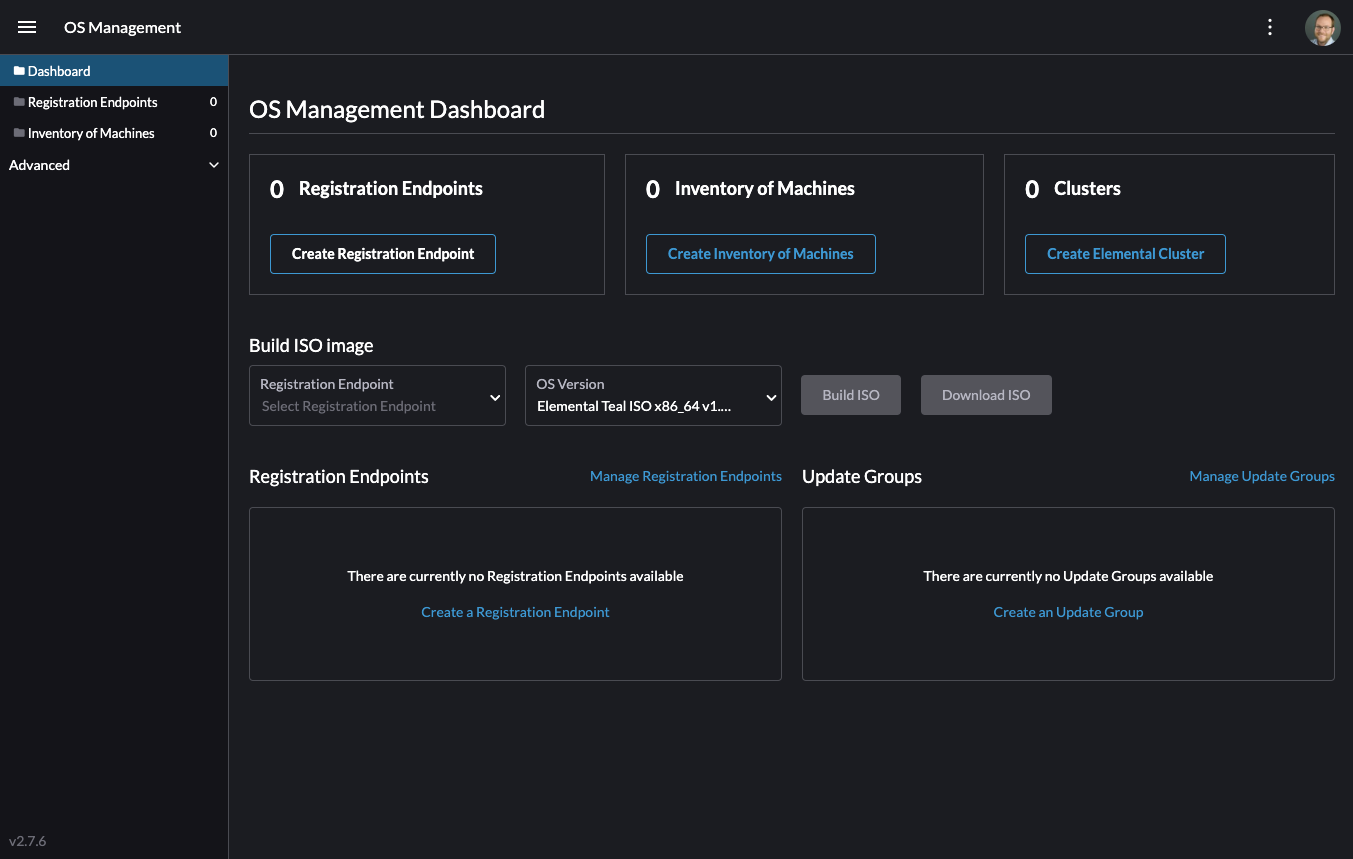
From the OS Management Extension, click "Create Registration Endpoint":
Give this configuration a name
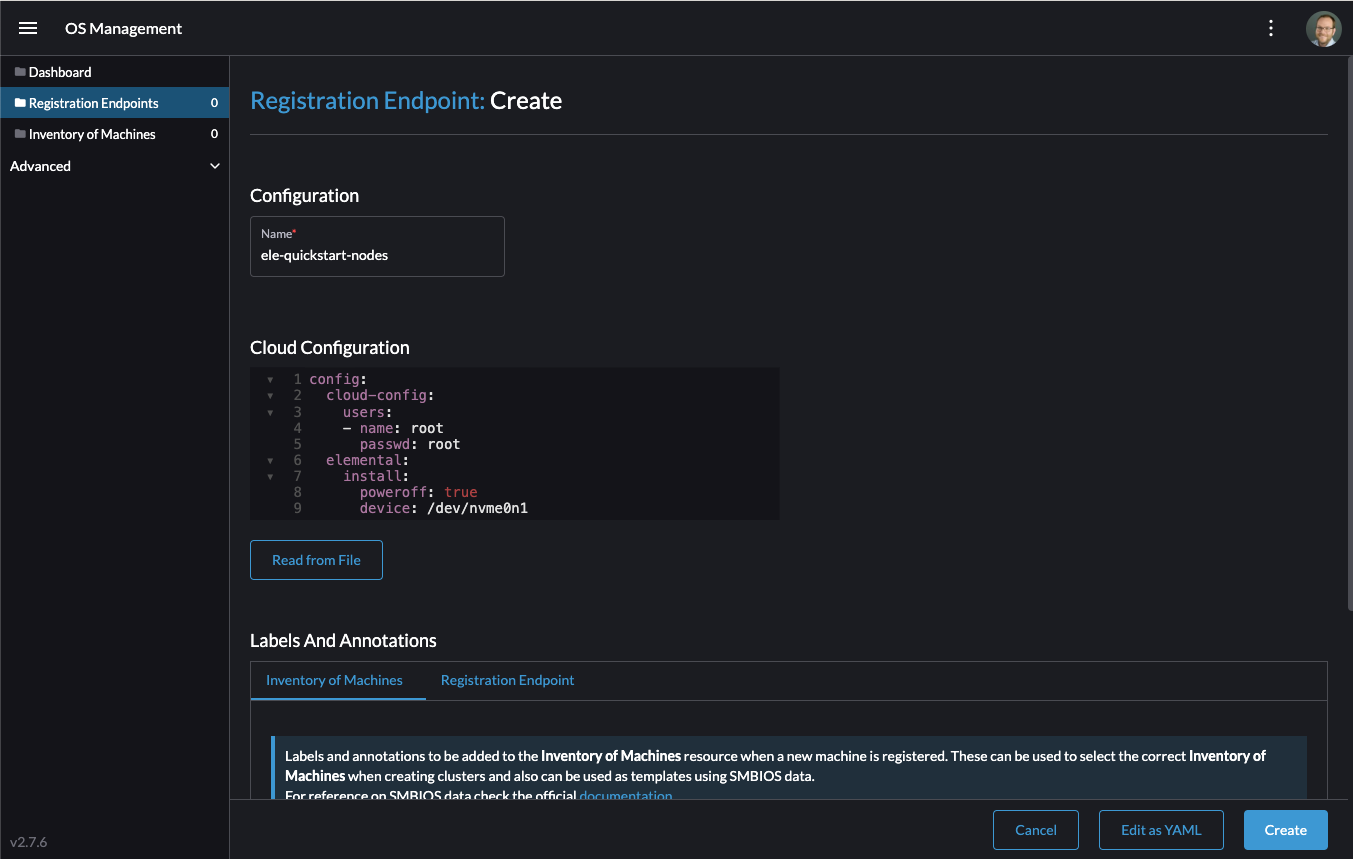
You can ignore the Cloud Configuration field as the data here is overridden by the following steps with Edge Image Builder
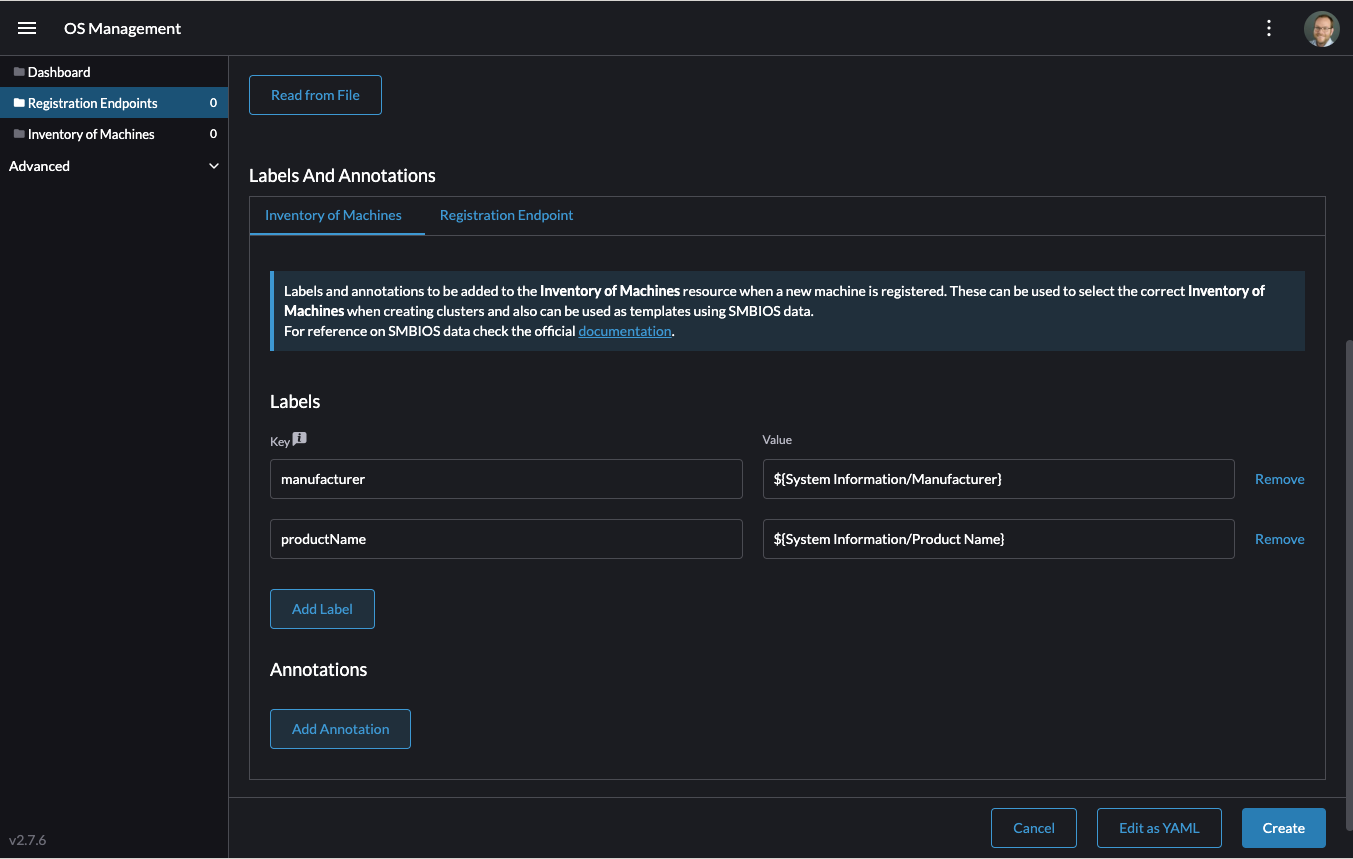
Next you can scroll down a bit and click "Add Label" for each label you want to be on the resource that gets created when a machine registers. This is useful for tracking which machine is which.

Lastly, click "Create" to save the configuration!
Afterwards, find and note the endpoint that gets assigned:
- YAML
- UI Extension
kubectl get machineregistration ele-quickstart-nodes -n fleet-default -o jsonpath '{.status.registrationURL}'
If you just created the configuration, you should see the Registration URL listed and can click "Copy" to copy the address:
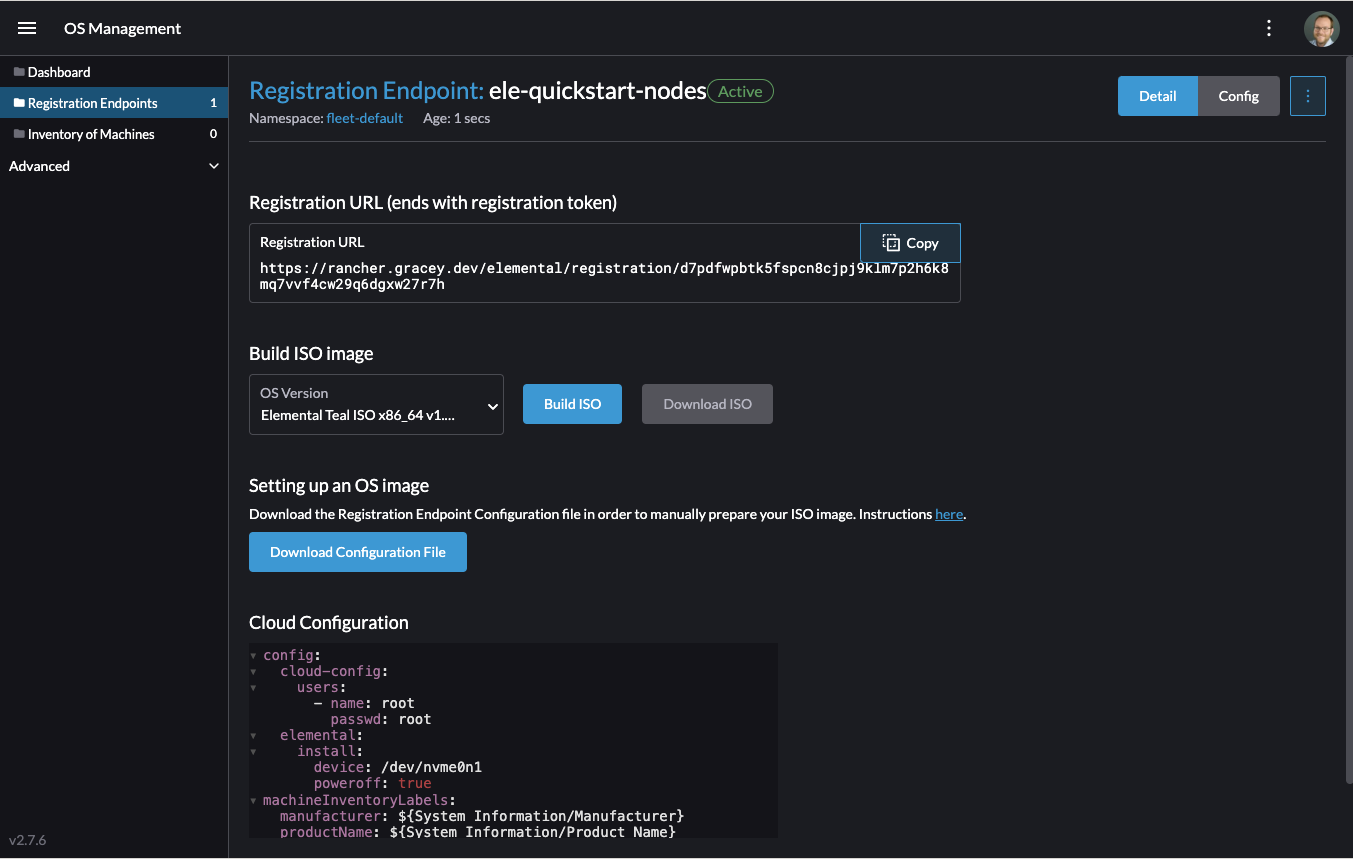
If you clicked away from that screen you can click on "Registration Endpoints" in the left menu then click the name of the endpoint you just created.
This URL will be used in the next step.
Build installation media
While the current version of Elemental (at time of writing) does have a way to build it's own installation media, we need to do this with the Edge Image Builder instead so the resulting system is built with SLE Micro as the base Operating System.
For more details on the Edge Image Builder, you can check out the Getting Started Guide for it. Or, for a more full discussion on it's capabilities there is a [full page documenting it].
TODO: write the simplest EIB flow possible here
From a system with Podman, Docker, or Rancher desktop installed, run
- Linux
- Mac OS
- Windows
TODO: Add elemental rpms
mkdir -p eib_quickstart/base-images
mkdir -p eib_quickstart/elemental
mkdir -p eib_quickstart/rpms

curl <REGISTRATION URL FROM ABOVE> -o eib_quickstart/elemental/elemental.yaml

echo > /eib_quickstart/eib-config.yaml <<< HEREDOC
apiVersion: 1.0
image:
    imageType: iso
    baseImage: SLE-Micro.x86_64-5.5.0-Default-SelfInstall-GM.install.iso
    outputImageName: elemental-image.iso

HEREDOC

docker run --rm -it -v $PWD/eib_quickstart/:/eib registry.opensuse.org/home/atgracey/eib/container/containerfile/eib:latest /usr/bin/eib -config-file eib-config.yaml -config-dir /eib -build-dir /eib/_build

TODO: update image to released image on release
Podman can be used in place of docker
TODO: any difference?
TODO: ???
If you are booting a physical device, we need to burn the image to a USB flash drive. This can be done with:
- Linux
- Mac OS
- Windows
TODO: how to find sdX
sudo dd if=/path/to/output.iso of=/dev/sdX
TODO: any difference?
sudo dd if=/path/to/output.iso of=/dev/sdX
TODO: ???
Boot downstream nodes
Now that we have the installation media created, we can boot our downstream nodes with it.
For each of the systems that you want to control with Elemental, add the installation media and boot the device. After installation, it will reboot and register itself.
If you are using the UI Extension, you should see your node appear in the "Inventory of Machines".
Create downstream clusters
Now that Elemental can see and control our downstream machines, we can create a cluster from those machine.
- YAML
- UI Extension
There are two objects that we need to create when provisioning a new cluster using Elemental.
The first is the MachineInventorySelectorTemplate. This object allows us to specify a mapping between Clusters and the machines in inventory.
Create a file called selector.yaml with the contents:
apiVersion: elemental.cattle.io/v1beta1
kind: MachineInventorySelectorTemplate
metadata:
name: location-123-selector
namespace: fleet-default
spec:
template:
  spec:
    selector:
      matchLabel:
        locationID: 123
The we can create it with
kubectl create -f selector.yaml
This will match any machine in the inventory with the label locationID: 123 so we need to add this label to the machines that should be matched. We can do this with:
kubectl label MachineInventory -n fleet-default <name of MachineInventory object> locationID=123
Next, we create the cluster itself. There are a lot of options here but a simple single-node K3s Cluster looks like:
apiVersion: provisioning.cattle.io/v1
kind: Cluster
metadata:
name: location-123
namespace: fleet-default
spec:
kubernetesVersion: v1.26.11+k3s2
rkeConfig:
  machinePools:
    - name: pool1
      etcdRole: true
      controlPlaneRole: true
      workerRole: true
      machineConfigRef:
        kind: MachineInventorySelectorTemplate
        name: location-123-selector
        apiVersion: elemental.cattle.io/v1beta1
        quantity: 1
To provision this cluster, we can create a file with these contents called cluster.yaml and run
kubectl create -f cluster.yaml
The UI extension allows for a few shortcuts to be taken. (But is likely to much manual work when managing a large number of locations)
As before, open the left "hamburger menu" and select "OS Management".
This will bring you back to the main screen for managing you Elemental systems.
On the left sidebar, click "Inventory of Machines".
This, unsurprisingly, opens the inventory of machines that have registered.
To create a cluster from these machines select the system(s) you want to you, click the "Actions" dropdown, then "Create Elemental Cluster".
This will open up the Cluster Creation dialog while also creating a MachineSelectorTemplate to use in the background.
On this screen, you can configure the cluster you want to be built. For this quickstart, I will select K3s v1.26.11+k3s2 and leave the rest of the options alone.
TODO: Screenshot
TODO: update version of k3s once new Rancher version is stable
You may need to scroll down to see more options
TODO: Screenshots
After creating these objects, you should see a new kubernetes cluster spin up using the new node you just installed with.
To allow for easier grouping of systems, you could add a startup script that finds something in the environment that is known to be unique to that location.
For example, if you know that each location will have a unique subnet, you would write a script that finds the network prefix and adds a label to the corresponding MachineInventory.
This would typically be custom to your system's design but could look like:
INET=`ip addr show dev eth0 | grep "inet\ "`

elemental-register --label "network=$INET" --label "network=$INET" /oem/registration
Next steps
TODO: prose
Some recommended next steps after using this guide are:
- End to end automation with Fleet (TODO: Create page and link)
- Additional network configuration options (TODO: Link to right section in EIB)
- TODO: ???
Planned changes
There are a few changes to this that are currently planned (at time of writing):
Improved support for and integration with SLE Micro 6.x
TODO: write more about this
- Image building done in the Elemental Operator
- Both A/B and RPM based transactional updates
- UI improvements for non-teal images
These improvements are expected to be included in the SUSE Edge 3.1
Additional Resources
TODO: What additional resources should we link?